
Understanding Vapor Barrier Installation
What is a Vapor Barrier?
A vapor barrier is a crucial component in moisture control within residential structures, particularly in crawl spaces and basements. This barrier typically consists of a layer of polyethylene or similar materials designed to prevent moisture from the ground and surrounding environment from infiltrating your living space. By blocking water vapor, these barriers help maintain indoor air quality and structural integrity, ultimately promoting a healthier home environment.
Importance of Vapor Barrier Installation
The installation of vapor barriers serves several critical functions. Firstly, they protect against mold and mildew formation, which can thrive in damp conditions. This is particularly important in areas where humidity levels are high. Secondly, vapor barriers contribute to energy efficiency by preventing heat loss during colder months and reducing the load on heating systems. Lastly, they extend the lifespan of structural elements of a home by reducing the risk of rot and decay caused by trapped moisture. Proper Vapor Barrier Installation is therefore essential for long-term home maintenance and sustainability.
Key Materials for Effective Installation
Choosing the right materials for vapor barrier installation is vital to its success. Common materials include:
- Polyethylene sheeting: This is the most widely used material due to its effectiveness and affordability.
- Foil-faced insulation: This material serves dual purposes, acting as insulation while also reflecting moisture.
- Liquid membranes: These can be applied directly to concrete and provide a seamless barrier.
It is important to select a barrier with a thickness of at least 6 mils to ensure durability and effectiveness.
Preparation Steps for Vapor Barrier Installation
Evaluating Your Crawl Space
Before starting the installation, it is essential to assess your crawl space thoroughly. Look for signs of moisture, such as puddling water, damp spots, or mold growth. Check vents and insulation for damage and ensure that no structural elements are compromised. This evaluation will help you determine the best course of action and whether additional moisture remediation might be necessary before the installation of the vapor barrier.
Choosing the Right Vapor Barrier Material
As previously mentioned, selecting the right material is crucial. Opt for a product with a high permeability rating if your area is prone to flooding, or consider a more robust option for environments with persistent moisture issues. Be sure to account for factors like local climate conditions, the specific moisture levels in your space, and the intended use of the area when making your selection.
Tools Needed for Installation
Gathering the right tools will ensure a smoother installation process. Essential tools include:
- Utility knife or scissors for cutting the material to size.
- Measuring tape for accurate measurements.
- Stapler or adhesive for securing the barrier to any wooden supports.’
- Duct tape to seal seams between sheets of vapor barrier.
- A shovel may be necessary for initial groundwork if excavation is needed.
Step-by-Step Vapor Barrier Installation Guide
Gathering Necessary Materials
With a clear plan in place and all tools at your disposal, begin by gathering the necessary materials. Ensure you have a sufficient amount of the vapor barrier material, duct tape, and any ancillary supplies like a stapler or adhesive to complete the job. Always have a few extra feet of material on hand to account for mistakes or unforeseen complications.
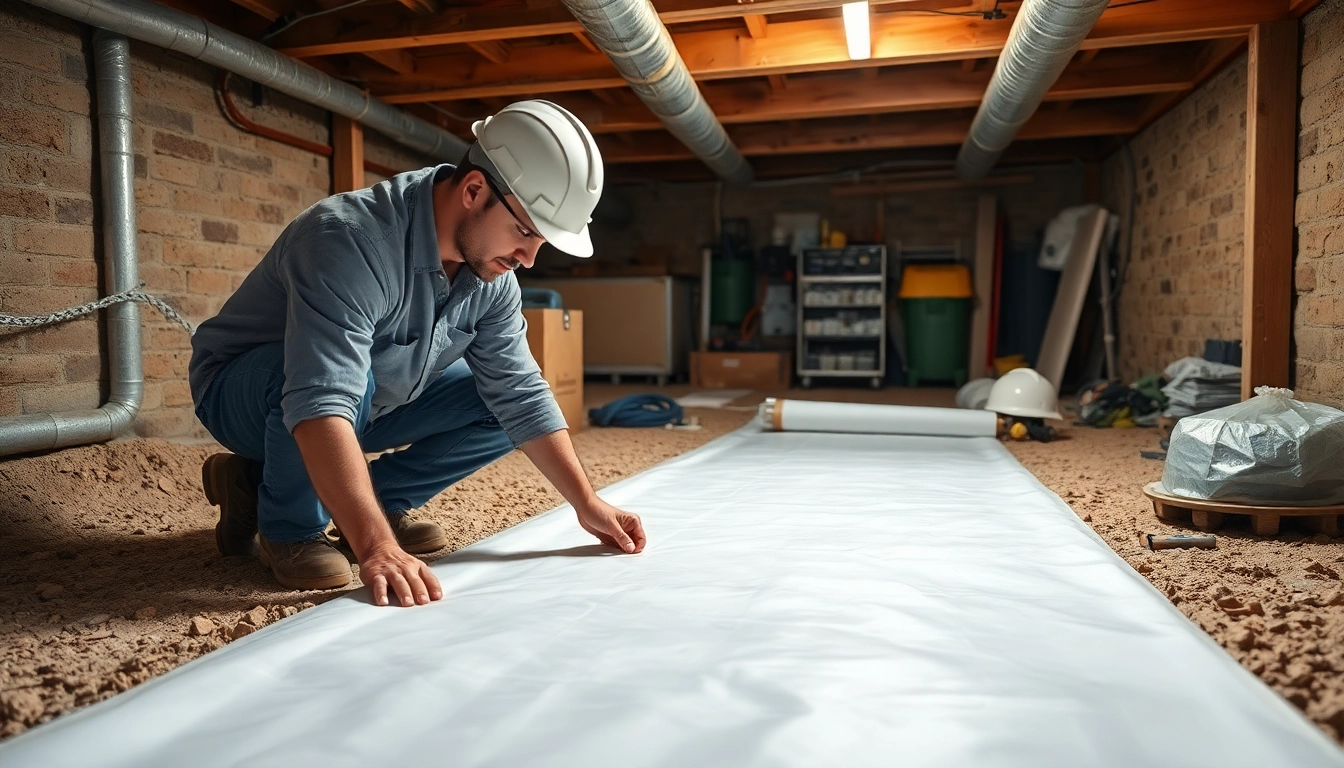
Correctly Positioning the Vapor Barrier
Start by laying the vapor barrier flat on the ground of the crawl space, ensuring it extends up the walls where needed. Overlap seams by at least 12 inches and tape them securely to eliminate any gaps. Use additional adhesive or staples to secure the barrier to walls or any structural supports. When installing, ensure there are no folds or wrinkles, as these could allow moisture to seep through.
Sealing and Finishing Touches
Once the vapor barrier is positioned correctly, take the time to seal all edges thoroughly. This may involve applying duct tape, additional adhesive, or even using a liquid sealant at the corners and seams. Finally, perform a double-check of the entire area to confirm that there are no gaps or weak points that may compromise the effectiveness of your new vapor barrier. Proper sealing ensures you achieve the best moisture control possible.
Common Challenges in Vapor Barrier Installation
Identifying Moisture Issues
One of the most significant challenges faced during vapor barrier installation is accurately identifying existing moisture issues. Before installation, conduct a thorough inspection to pinpoint potential trouble spots. Utilize moisture meters, inspect drainage systems, and evaluate surrounding vegetation for excessive overgrowth to identify areas of concern.
Adapting Installation for Different Environments
Different environments may require specific adjustments to the installation process. For example, if you live in a flood-prone area, it may be necessary to elevate the moisture barrier or incorporate additional drainage systems. Conversely, in a dryer environment, a less permeable barrier may be adequate. Always tailor your approach to the specifics of your environment to ensure effectiveness.
Ensuring Longevity of the Installation
To guarantee the long-term efficiency of your vapor barrier installation, regular inspections are advised. Look for signs of damage, such as tears or mold growth, and address them immediately. Additionally, keeping the surrounding external drainage systems clear will help manage moisture levels and protect the integrity of your installation.
FAQs About Vapor Barrier Installation
How long does vapor barrier installation take?
The installation process typically takes 4 to 6 hours, depending on the size of the crawl space and the complexity of the project. Preparation may take additional time.
Can I install a vapor barrier myself?
Yes, with proper tools and materials, many homeowners can install vapor barriers themselves. However, ensure you follow all necessary steps carefully.
What thickness is recommended for a vapor barrier?
A thickness of at least 6 mils is generally recommended, but thicker materials may provide added durability for high-moisture areas.
How does a vapor barrier improve home energy efficiency?
By reducing heat loss and preventing moisture ingress, a vapor barrier helps maintain a consistent indoor temperature, thereby improving home energy efficiency.
What maintenance does a vapor barrier require?
Regular inspections are essential. Check for tears, mold, or signs of moisture. Maintenance typically only requires repairing or replacing damaged areas as needed.